Showing posts with label tip. Show all posts

2023-09-28

Regular Expressions - Examples and Use Cases

Background

This post should serve as a repository of selected use-case reqular expressions, sorted by utility/name. It is predominantly centered around Linux and user-space utilies (with a certain amount of Cisco IOS-based examples as well in its heading and subheadings). It will hopefully be continually updated as I intent to keep adding to it as I see buld more regular expression use cases.

MDADM

The following was useful to gather mdadm information when I had an issue with a missing block device in a RAID array (which turned out to be SATA cables that where accidently swapped when performing maintenance/cleaning causing device unexpected device renaming which ultimately bumped a device off the array - sdb in my case). The examples here uses simple patterns to show the linux block devices in an array and looking for log entries

user@host:~$ sudo mdadm --detail /dev/md0 | egrep '\/dev\/sd?'
       3       8       64        0      active sync   /dev/sde
       1       8       32        1      active sync   /dev/sdc
       4       8       48        2      active sync   /dev/sdd

user@host:~$ cat /etc/mdadm/mdadm.conf | egrep '\/dev\/sd?'
DEVICE /dev/sdb /dev/sdc /dev/sdd /dev/sde
user@host:~$
user@host:~$ sudo dmesg | grep md0
[    2.701684] md/raid:md0: device sdc operational as raid disk 1
[    2.701686] md/raid:md0: device sdd operational as raid disk 2
[    2.701687] md/raid:md0: device sde operational as raid disk 0
[    2.702549] md/raid:md0: raid level 5 active with 3 out of 3 devices, algorithm 2
[    2.702574] md0: detected capacity change from 0 to 8001304920064
user@host:~$ 

HDPARM

For similar reasons to the MDADM, I initially suspected that a disk was faulty and wanted to extract the serial numbers of each for warranty lookup. This is how I acheived that outcome (sans actual serial numbers).

user@host:~$ sudo hdparm -I /dev/sd? | egrep '(\/dev\/sd?|Serial\ Number)'
/dev/sda:
        Serial Number:      *** REDACTED ***
/dev/sdb:
        Serial Number:      *** REDACTED ***
/dev/sdc:
        Serial Number:      *** REDACTED ***
/dev/sdd:
        Serial Number:      *** REDACTED ***
/dev/sde:
        Serial Number:      *** REDACTED ***
user@host:~$

SCREEN

So, sometimes a screen is killed or exited (often accidently) and rather than opening up the local user screenrc file, looking for the screen/entry/command and then executing the screen command manually to restore it, with the help of grep, I simply execute it dirrectly with bash substitution. Here are a couple of examples:

$(grep virsh ~/.screenrc)
$(grep /var/log/messages ~/.screenrc)
$(grep virt_snapshot ~/.screenrc)

LVM

At some point, we might need to review LVM volumes to see where we can scale and resize etc. The following allowed me to quickly see everything at a glance in order to formulate a plan for resizing.

user@host:~$ sudo lvdisplay | egrep "LV (Name|Size)"

[sudo] password for user:
  LV Name                video
  LV Size                <4.02 TiB
  LV Name                audio
  LV Size                750.00 GiB
  LV Name                hdimg
  LV Size                <2.51 TiB
  LV Name                swap
  LV Size                16.00 GiB
  LV Name                var-tmp
  LV Size                8.00 GiB
user@host:~$

Cisco IOS

A collection of various Cisco IOS commands and the very limited IOS regular expression engine on an IOS device (or IOS-XE's IOSD).

show version

Show a consolidated view of uptime, firmware and software version & reason for reload (minus all the Cisco copyright and releng information):

SWITCH#show ver | incl Cisco IOS Software|(ROM|BOOTLDR)|uptime|System (returned|restarted|image)
Cisco IOS Software, C3750 Software (C3750-IPSERVICESK9-M), Version 15.0(2)SE11, RELEASE SOFTWARE (fc3)
ROM: Bootstrap program is C3750 boot loader
BOOTLDR: C3750 Boot Loader (C3750-HBOOT-M) Version 12.2(44)SE5, RELEASE SOFTWARE (fc1)
SWITCH uptime is 1 week, 3 days, 22 hours, 29 minutes
System returned to ROM by power-on
System restarted at 12:28:16 WST Sun Sep 17 2023
System image file is "flash:/c3750-ipservicesk9-mz.150-2.SE11.bin"
SWITCH#

show etherchannel

Show portchannel member state times - This is particularly useful in correlating events for possible cause without having to rely on syslog:

SWITCH#show etherchannel 1 detail | incl ^(Port: |Age of the port)
Port: Gi1/0/15
Age of the port in the current state: 10d:22h:41m:32s
Port: Gi1/0/16
Age of the port in the current state: 10d:22h:41m:31s
Port: Gi1/0/17
Age of the port in the current state: 10d:22h:41m:30s
Port: Gi1/0/18
Age of the port in the current state: 10d:22h:41m:30s
SWITCH#

2023-09-19

EVE-NG and IOL copy run unix:

Lately, I've found myslelf working more on EVE-NG than the Cisco Learning Labs (CLL) which has allowed me to go beyond the constraints of the traditional learnings and key topics and allows me to tinker more than I probably should.

A long time ago I thought that EVE (possibly pre-NG) allowed the user to litterally download the text file of the running config to file instead of having to rely on term len 0, show run and screen-scraping the contents and then offloading the resulting clipboard to a file and saving it *yawn*

Today I discovered that you can save a config straight to a file in EVE-NG on the linux filesystem (at least you can with IOL).

The way to do this is simply use the copy command with unix:file as the destination, replacing file with the name of the file;

R1#copy start unix:r1.txt 
Destination filename [r1.txt]? 
1683 bytes copied in 0.011 secs (153000 bytes/sec)

R1#

It is litterally that simple.

You can then find the file under the EVE-NG staging area, which you can then work on as a plain-text file;

root@eve-ng:~# ls -alh /opt/unetlab/tmp/1/e6eadfea-e000-41d7-abe9-98f8004bb23f/1 | egrep "r.\.txt$"
-rw-rw-r-- 1 unl1 unl 1.7K Sep 19 16:40 r1.txt
root@eve-ng:~#

I can only imagine how useful this could be in reverse by merging config snips straight from the emulated nodes off the host filesystem and perhaps even generating templates for labs etc.

More testing is required.

2020-07-25

Adventures in Open Source (Part 3)

The (somewhat) popular Adventures in Open Source series is back and even better than before

SYSLINUX
Along time ago and, I was able to force a Toshiba Satellite A10 to boot a Ghost Boot Wizard created disc (ISO) thanks to syslinux.
This seemed kind of tricky to begin with but looking back on it, it is pretty trivial.

First of all I mounted the ghost iso file as loopback and copied the file contents to a temporary directory ($pathspec can be any empty temporary directory such as /tmp/ghost).

sudo mount -o loop /usr/temp/ghost.iso /mnt/loop0
cp -R /mnt/loop0/* $pathspec

Next up I copied the necessary syslinux files to the temporary directory
cp /usr/lib/syslinux/isolinux.bin $pathspec
cp /usr/lib/syslinux/memdisk /$pathspec

I then had to create an isolinux configuration file called isolinux.cfg in the temporary ($pathspec) directory with the following contents.
cat > $pathspec/isolinux.cfg default ghost timeout 150 prompt 1 label ghost kernel memdisk append initrd=osboot.img ^Z

Lastly, I moved up one directory and created the iso with mkisofs/genisoimage
cd ..
mkisofs -v -J -V $volid -N -A '' -sysid '' -o $filename -b isolinux.bin -c boot.cat \
-no-emul-boot --boot-load-size 4 -boot-info-table $pathspec

That's all!

NOTE: Due to the varying nature of Linux distributions, I have purposefully used variables (named in accordance with mkisofs/genisoimage documentation) so as to aid in making this procedure as dynamic as possible.


ntfsclone(8)
Since I still help people with Windows (only close friends and relatives now), and I decided to give this tool another try (last time I used it, I used the "special" image format, which cannot be loopback mounted).

Bellow is the output (proof) of a successful ntfsclone (and ntfs-3g loopback mount).
localhost ~ # ntfsclone -o /u1/S3A1378D001-ntfsclone.img /dev/sde1ntfsclone v2.0.0 (libntfs 10:0:0)NTFS volume version: 3.1Cluster size : 4096 bytesCurrent volume size: 39999500288 bytes (40000 MB)Current device size: 39999504384 bytes (40000 MB)Scanning volume ...100.00 percent completedAccounting clusters ...Space in use : 13676 MB (34.2%)Cloning NTFS ...100.00 percent completedSyncing ...

This is me loopback mounting a standard ntfsclone (not special image format) image:
ntfs-3g -o loop /u1/S3A1378D001a-ntfsclone2.img /mnt/loop0mount | grep fuse/u1/S3A1378D001a-ntfsclone2.img on /mnt/loop0 type fuse (rw,noatime,allow_other)


Adventures in docker and portainer

Around 2007 I was gifted some old hardware which entailed an ASUS motherboard, 8Gb or RAM and an AMD CPU.

It wasn't until a few years later that I decided to build it into a home server.

There was no hardware virtualisation and either I didn't know how to do or didn't want to do software virtualisation and software RAID, instead all my services, DHCP, DNS, SAMBA, FTP etc. and I think even Plex as well (or maybe that came later) was running co-resident on a bare-metal JBOD server.

Since it was simple design, it was relatively simple to operate and maintain. I even managed to successfully P2V the server when I did a hardware refresh and it continued operating for the most part.

One day I upgraded the system and a Python-based application which catastrophically broke and I since abandoned picking it back up until recently because I discovered Docker containers.

Fast-forward to today, now I have a big proponent of my services and apps hosted in a dedicated docker-engine VM and maintenance has never been easier.

I've even learned how to share the same network namespace as other containers such as stacking a container with a VPN container and all it took was using the following in the compose file under the containers service definition:


network_mode: "container:<container>"

Which, I leaned and adapted the above from the following YouTube video:

How to route any docker container through a VPN container

Further to this my Docker engine VM is exclusively managed now using portainer.io where I can easily create and delete (and in the process upgrade) containers with ease, which means everything stays fresh and all I have to be concerned about is backing up the persistent storage!

Armed with knowledge of how docker works, I've written up slide deck on docker to help demystify docker containers and hopefully improve overall understanding for the potentially emerging DevOps capability.

2015-09-03

BIND (named) server remidiation [part 2]

Following up from my previous post (BIND (named) server remidiation), I spent a good couple hours further developing and testing the configuration but failing to get a bind9 reverse lookup zone to load only to find out that I had a slight typo in the reverse lookup zone definition

named-checkzone was returning OK, but named itself was failing to load the zone file with the error:

zone X.X.X.in.addr.arpa/IN: has 0 SOA records
zone X.X.X.in.addr.arpa/IN: has no NS records
zone X.X.X.in.addr.arpa/IN: not loaded due to errors.

It wasn't until I had a friend take a closer look at then the problem became clear:

I defined the zone as .in.addr.arpa instead of .in-addr.arpa in the named.conf include file which references the zone file.

Some things I have learned is:

  • Check the logs (in my case, on a default debian/bind9 install this was /var/log/syslog) when things don't work.
  • Always check your config with the bind DNS tools before reloading
  • Always check your zones files with the bind DNS tools before reloading
  • Keep zone files neat and group together similar resource record types.

Now that I have the dev domain DNS working, I just need to look at setting up DHCP and testing dynamic DNS.

I also considered moving different resource records for each zone into a separate file, but this is not necessary, due to the (current) size of the network.

Once this is all done, tested and implemented in 'production', I will also consider keeping a similar configuration in dev as a slave for all zones from the primary DNS or just as it is and just for testing.

2015-08-26

BIND (named) server remidiation

Since I virtualised my old failing physical server into a VM, I have found it less and less easy to administer and maintain (read: configuration files).

So, I am looking and spinning up new Debian servers for more specific tasks, network services, games servers, file services etc.

The fist, and most important thing I need to migrate is DNS. That way I can have it simply running in parallel with the old, ready to essentially, stop the service (after making sure DHCP serves out this DNS IP address as well of course!).

Now, here comes the "clever" part or the goals of this approach (or so I thought):

  1. Install named.
  2. Configure it to be a slave for the existing zones
  3. re-configure it to be a master (complete with zone files)

Pretty simple right? Not so much. Well, thanks be to the 'Debian' way of doing things, it was very quick and easy to have a the zones slaved, but when I went to look at the files I was expecting, they where still empty, since I had created empty zone files to begin with.

Some poking around later and I discover that it is transferring the zones fine, but there was an issue with permissions for the zone files, or more specifically, the directory where they lived. A quick chmod -R 0777 /zone/file/directory later and a restart of the service, voila! Except.... something was not right...

The zone files seemed to be in a binary format as file would have me believe they were of type: data

I could have converted them back to plain text using the bind-tool named-compilezone(8) but, I couldn't commit my time to learning how to get the syntax correct for one small job, besides I learned that it is a crazy default in order to get a performance increase, however minuscule that would be given such a small DNS server implementation (for now).

So as per the article "Bind 9.9 – Binary DNS Slave file format" (linked above) or more authoratively as per the Chapter 6. BIND 9 Configuration Reference section of the BIND 9.9 Administrator Reference Manual (ARM) which states (incorrectly):

masterfile-format
Specifies the file format of zone files (see the section called “Additional File Formats”). The default value is text, which is the standard textual representation, except for slave zones, in which the default value is raw. Files in other formats than text are typically expected to be generated by the named-compilezone tool, or dumped by named.

So, knowing this I edited /etc/bind/named.conf.options to include the following:

masterfile-format text;

Perfect. (Just like me ;-) I now have a duplicate of the zones served on the master server, which can, and will soon be decommissioned, not to mention the new servers zones getting a makeover with many many more zones as well as a dynamic-update zone - more to come on this soon.

2011-11-20

Google Plus killed the technology blog

This may be the final entry in this and my other blogs.

I managed to painstakingly avoid using Facebook for many years, and instead waited patiently for Google to create it's social networking site, Google Plus (If you have never heard of Google+, I strongly urge you to go back to the rock you have so obviously been living under and/or go read some other non-technical site).

Ever since I have been active on Google+ (since soon after it's initial Beta period), have found it to be absolutely brilliant, if not addictive, and a far better medium to which I can expose my technical knowledge and findings to the masses.

This means that there is little or no time for the blog and I am almost positively confident of using one or more Google+ page(s) to replace this and most probably all of my other blogs.

Thank you Blogger for your great blogging service, but thank you so much more Google plus for finally giveing me what I (and so many other Google fans) wanted.

2009-11-25

xbox360 and WMP11 fail

After about two years of procrastination, I finally got an xbox360 to fulfil my Burnout gaming needs. Before I got the (MW2) bundle, I installed Windows Media Player 11 (using the validation bypass trick). Now sitting here relieved that I finally got media sharing to work, I thought I'd blog about the one simple thing wrong with media sharing:

  1. UNC network paths.
It took almost 2 weeks to find an answer to why my library was not showing up on the xbox360 and the answer lies here.

In summary (for those that don't want to follow that URL for some reason):

"If you want to share files that are not located locally on your machine, Microsoft has chosen to prevent you from sharing content located on network locations (UNC paths) like \\MACHINENAME\sharename"

Luckilly there is an undocumented registry "hack" that will fix this:

Windows Registry Editor Version 5.00

[HKEY_LOCAL_MACHINE\SOFTWARE\Microsoft\MediaPlayer\Preferences\HME]
“EnableRemoteContentSharing”=dword:00000001

Huge thanks go out to GibStorm for documenting this so well...

2009-08-21

vim + gnupg = password manager

After finding that there are very little native password managers for linux, I decided to see if I could find a way to open my encrypted password file using a console-based editor without putting any plain text onto the disk at all (ie. transparent editing of gnupg encrypted files).

I stumbled onto the vim website (by way a Google search) and found a nice little script (plugin) that does all this for me!

Initially, I had some issues with getting it working but that was mainly due to exporting $GPG_TTY incorrectly :-P

However, as I use screen to manage everthing I do from the one terminal window/ssh session (vim incuded), the plugin works fine but fails to decrypt files when vim is invoked as a new screen.

I suspect that it's attributed to the $GPG_TTY variable, but my knowledge of screen and some other aspects of Linux are limited.

I now use vim + gnupg for my encrypted password file.


UPDATE 21/08/2009 @ 13:15
There seems to be an issue where the the GPG_TTY variable needs to re-exported every time you change to a another screen/pts. I have made myself a workaround, whereby I run a simple script that first exports the variable and then opens vim with the encrypted pwd file, but then vim removes the standard UDLR keybord controlls and falls back to classic vi mode. *sigh*

2009-08-12

iPhone battery fail

My iPhone 3GS seems to be working well but with one small problem. Battery life sux.

The stupid thing lasts anywhere from about ½ a day to about about 1 day, which doesn't seem right at all.

I had also already jailbroken the the thing within the first few weeks of owning it, but since the latest firmware (3.0.1) came out recently, I thought I would update it in the hopes that Apple had silently fixed a possible power issue and to remove any jailbreak packages that could be causing this problem. No luck here folks.

About a week later I discovered that the phone was constantly emitting RF as a cheap set of speakers that I had turned on, would pick up the RF as interference and damn was this phone was being noisy!

After calling the Virgin Mobile iPhone hotline to get some support (which still didn't help mind), I stumbled onto apple's own iPhone battery information page and went through the troubleshooting steps, I seemed to have found the answer! Push mode notification. Turning it off has quietened it and the battery bar has stopped draining quicker than a cold beer in summer.

I am happy the problem is fixed and the battery is still in reasonably good condition, but this begs the question: Why is it on by default?

2009-02-17

kde4

KDE4 finally hit stable in gentoo's portage! *woohoo!* (as of about a month ago :P)

I had to wait a few weeks so that package blocks got sorted out in portage (well, at least now there is only 2 rather than the 4 from last week), which just goes to show that immediately trying to update to anything isn't always a good idea! :P

so now the dell xps is chugging away at building all the kde packages and dependencies (as well as updates from about 4 weeks ago) etc etc and hopefully when I wake up tomorrow I will be greeted with a shiny slick new KDM :)

I really should be updating my diary-blog but I wanted to keep a record of the fact that I have figured out that waiting for sane dependency handling by portage updates is a good thing!

2008-06-15

dmix

After many changes in my USE flags (alsa/arts) and the fact that I kept breaking my audio (NWN would have no sound, wine kept blocking other apps from accessing the audio harware and many other problematic things), I finally got a working dmixed (and arts free) audio setup *yay*.

This is how I (FINALLY) fixed it:

  1. Created a working /etc/asound.conf (see bellow) and restart alsasound.

  2. Removed arts altogether in favour of alsa (USE="-arts alsa") in /etc/make.conf, ran emerge -NDv world

  3. while tired="true"; do; sleep 8h; done

  4. Restarted X (/etc/init.d/xdm restart).

...and now I have dmix (which now works with wine!!!)!

Here is my /etc/asound.conf

pcm.dmixed {
ipc_key 1025
type dmix
slave.pcm "hw:0,0"
}

#one called "dsnooped" for capturing
pcm.dsnooped {
ipc_key 1027
type dsnoop
slave.pcm "hw:0,0"
}

#and this is the real magic
pcm.asymed {
type asym
playback.pcm "dmixed"
capture.pcm "dsnooped"
}

#a quick plug plugin for above device to do the converting magic
pcm.!default {
type plug
slave.pcm "asymed"
}

#a ctl device to keep xmms happy
ctl.pasymed {
type hw
card 0
}

#for aoss:
pcm.dsp0 {
type plug
slave.pcm "asymed"
}

ctl.mixer0 {
type hw
card 0
}

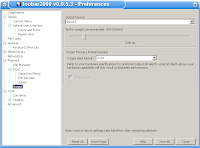
And as you can see in the screenshot below, you can see wine (foobar2000) using the dmix plug as it's output device :)


NOTE: Step 3 (sleeping) is optional :P

2008-05-08

VMPlayer Anoyances

Here's something that I discovered whilst trying to figure out why I could only start some VM's and not others on an ntfs3g volume.

# cat ntfs3g.txt
If you are running your Virtual Machine on an ntfs3g formatted volume and you encounter the following error:

VMware Player unrecoverable error: (vcpu-0)
Failed to allocate page for guest RAM!
A log file is available in "vmname.log". Please request support and include the contents of the log file.
To collect data to submit to VMware support, run "vm-support".
We will respond on the basis of your support entitlement.

Try adding the following line to your VMX (configuration file):

mainMem.useNamedFile=FALSE

NOTE: replace vmname with the name of your Virtual Machine.

I found this out from the following VMware Communities forum thread here

2008-04-24

Adventures in Open Source (Part 2)

Welcome to Part 2 of Adventures in Open Source!

This post is continuation on the previous article Adventures in Open Source (Part 1). In this post I will give you even more Tips, Tricks and useful information about Linux open source applications and their uses.

dellBiosUpdate
As the name suggests, dellBiosUpdate (which is provided by libsmbios) is tool for updating a Dell BIOS in linux. This came about because one day, I noticed an unanswered and unread post on forums.gentoo.org titled Dell BIOS update: extract_hdr, and I decided to investigate/research this because I also wanted to know if it was possible to flash your BIOS under Linux. I then found out (Thanks to the likes of the the Gentoo unofficial wiki post, HOWTO Dell BIOS Upgrade) that I don't even need M$DOS to flash the BIOS on my M1730!


quagmire ~ #modprobe dell_rbu
quagmire ~ # dellBiosUpdate -t -f system_bios_ven_0x1028_dev_0x01f7_version_a06/bios.hdr
BIOS file matches this system and is newer.
quagmire ~ # dellBiosUpdate -u -f system_bios_ven_0x1028_dev_0x01f7_version_a06/bios.hdr
Supported RBU type for this system: (MONOLITHIC, PACKET)
Using RBU v2 driver. Initializing Driver.
Setting RBU type in v2 driver to: PACKET
writing (4096) to file: /sys/devices/platform/dell_rbu/packet_size
Writing RBU data (4096bytes/dot):
........................................................................................
........................................................................................
........................................................................................
........................................................................................
........................................................................................
........................................................................................
.............
Done writing packet data.
Activate CMOS bit to notify BIOS that update is ready on next boot.
Update staged sucessfully. BIOS update will occur on next reboot.
quagmire ~ # rmmod dell_rbu

After doing the above, It occured to me that this process is somewhat the same as when you flash in windows, as the bios data is written to a special section of the bios or EEPROM, then a "bios update" flag is set so that the system will immediately start the flash process upon reboot. Nifty eh?


SCP (SSH)
I learned that it is possible to transfer files (and folders) to/from a remote path that has one or more spaces in it!

You need to enclose the entirety of the remote hosts argument in quotes and put escape sequences into it. For example:
scp -r "/media/sdd/2008-semester1/csg2207/Unit Schedule" "remotehost:~/UNI/2008-semester1/csg2207/Unit\ Schedule"


Gentoolkit (eclean-dist)
eclean-dist (a wrapper for eclean distfiles), is a tool provided by app-portage/gentoolkit that provides easy distfile cleaning (deleting)

After searching for a solution (thanks to the powers of google), I found that the Gentoo tool exists already. It seems to do an intelligent job at checking against installed packages and removing old distfiles (or tarballs). Pretty neat :)


rsync
That's right. rsync! I haven't done much research into the differences between cvs and rsync, but it seems to be a much easier to use alternative for synchronisation of file trees (UNI, savegames, software repositories, music, movies etc.) and using openssl (ssh) as a transport mechanism with almost no effort!

Here's an example (or proof) of me synchronising a folder of uni unit to my file server:

dean@quagmire ~ $ rsync -uav /media/UNI/2008-semester1/csg2207/ dean@192.168.1.2:~/UNI/2008-semester1/csg2207
Password:
building file list ... done
Assessments/assignment2/contrib/
Assessments/assignment2/contrib/delete.me
Assessments/assignment2/tmp/
Assessments/assignment2/tmp/the sample of risk management.docx.exe
Unit Schedule/
Unit Schedule/delete.me

sent 17094 bytes received 104 bytes 6879.20 bytes/sec
total size is 45568991 speedup is 2649.67

NOTE: I have to reserve TrueCrypt for private data only, as TrueCrypt requires elevated privileges, which I don't have on most UNI computers :(


That's it for this edition! I hope this was as interesting to read as it was for me to research and discover how to use them! Feel free to drop me a line if you have any contributions or corrections. Next post irssi!

 
Google+